
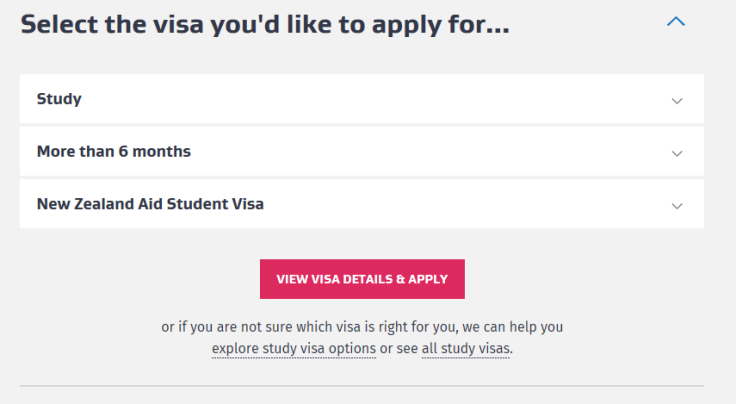
To be able to study in New Zealand for more than a year, I know I need to apply for a student visa. However, I live far from Cebu and Manila and I am also working on weekdays. Through a little bit of research, I know it can be done by myself (DIY). Thanks to the immigration of New Zealand website which I find friendly and pretty straightforward. With my scenario, I opted to use the Online Application instead of the paper-based application. Let me share how I did.
Step 1: Open the immigration of New Zealand site. Read and learn more about the details about your visa.
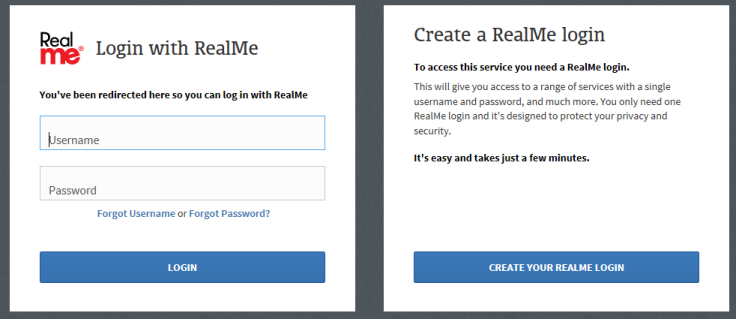
Step 2: You will be prompted to create or log in to your RealMe account. DO NOT FORGET YOUR PASSWORD.
Step 3: Once you are logged in, just click on “Make an Application”. You will be required to:
a. Fill out an application form
- You need to complete the answers to all questions in English.
- You do not need to complete all of the application form at once.
- You can save your application form at any time and come back.
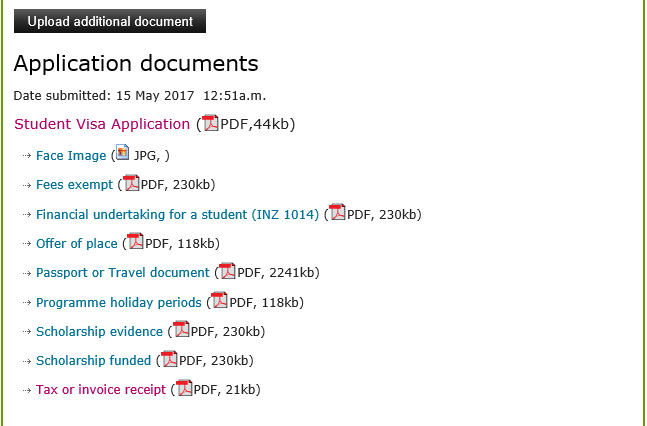
b. Upload documents
- You are required to upload documents to support your application.
- You are required to upload an acceptable photo of yourself to support your application. Your photo must show a full-front view of the face, head and shoulders and you must be looking straight at the camera with a neutral expression, eyes open, mouth closed and head straight. Nothing should obscure the facial features.
Experience:
c. Submit and View application
- You will be charged an application fee, you must pay before you can submit your application. This fee can only be paid using Visa™, MasterCard™ or UnionPay™.
- If you are not applying in New Zealand, you also need to provide a fee for the processing of your passport by the Visa Application Centre.
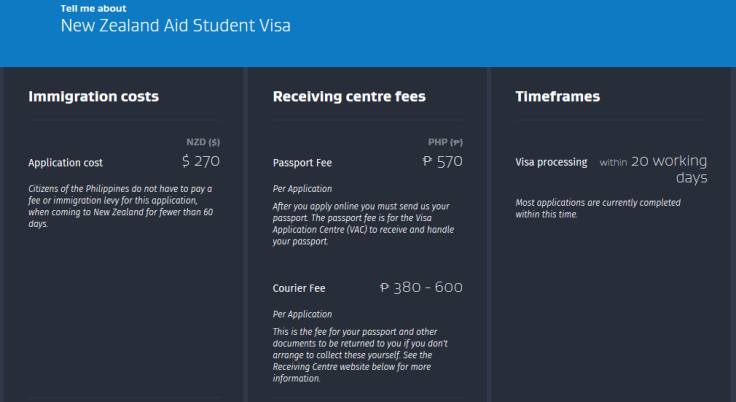
Experience: I paid for the visa fee (application cost) using a MasterCard™ online
d. Supply additional documents
- You may be asked to provide more documents to support your application. If they need more documents or information, they will get in touch with you by email or other means. So keep an eye on your mailbox, email, mobile phone, etc.
Once you clicked “Submit”, you can readily view your application.
Step 4: You shall receive an email acknowledging the receipt of your application and any other instruction.
Experience: I was asked to send Immigration New Zealand my passport along with the required handling fee so they can finalize my application.
So that’s how I did online.
Posting soon: How I Sent My Passport & Handling Fee By Post?


Leave a Reply